Posts

Showing posts from July, 2014

How to Roleplay

Image
This has just hit my radar, and touches on many points I've made over the years. I don't usually like to point people toward other blogs, I try to provide new content of my own, but this just says a lot of things really well. http://lookrobot.co.uk/2013/06/20/11-ways-to-be-a-better-roleplayer/ I've encountered a few of these problem players (particularly in many LARP events).

A Fox's Guide to Terrain Building (Part 1)

Image
Alright, so we've worked our way through a painting tutorial (almost). There is a lot more to the hobby of miniature wargaming than simply painting up figures and moving them around a table with the assistance of some rules and dice rolls. One of my favourite aspects of the hobby is developing terrain. I've had an idea for my peacekeeper force, it's basically a carry case for the unit of troops, and a field base of operations to go on a table. I've started drawing up a few sketches to get my mind heading in the right direction for the project.  The piece is based on the concept of the rapid deployment emergency shelter developed by Daiwa. http://www.daiwalease.com/edv-01/english/index.html Then I've applied a few retractable solar panels, and it will be painted up in a manner to match the troops in this unit. This tutorial series will go through my development process for the build, and a bit of my theory regarding wargaming terrain.

The Ancient Legacy of Plastic Animals

Image
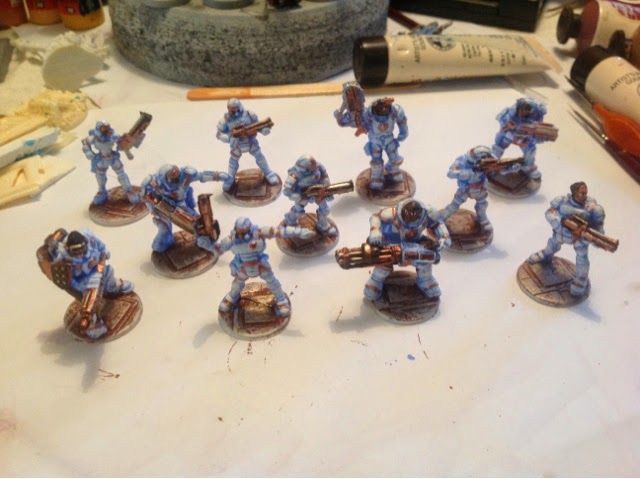
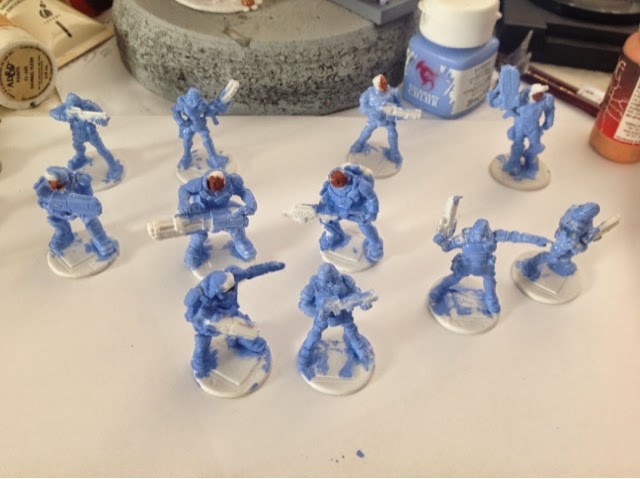
Late in 2013, there was a story about plastic animals doing the rounds. It appeared in a few places, but this seems to be the origin of the story. http://diterlizzi.com/home/owlbears-rust-monsters-and-bulettes-oh-my/ This story has sat in the back of my mind for a while. It has given me thoughts about finding plastic animals of my own and using them in games. The problem is that most of the plastic animals I've found have been common beasts (or at least common for this part of the world...kangaroos, emus, platypi, etc. and typical zoo animals with distinctive shapes like lions, elephants, camels), certainly nothing monstrous. But the other day I saw some plastic dinosaurs, and since I've been painting up plastic figurines, I figured that they might provide an opportunity. Voidstone Chronicles needs some interesting creatures for its heroes to face, and dinosaurs might make a fascinating addition to the setting. So I decided to paint them with the same techniques that

Other Mapmaking Theories

There are many people who draw maps, especially in RPG circles. One of the more prominent figures around is Dyson Logos. He's just posted some great stuff about cartographic methodology over on his blog. Go and have a look at it. http://rpgcharacters.wordpress.com/2014/07/27/on-the-drawing-of-maps/

A Fox's Guide to Figure Painting (Part 14)

Image
Not a lot of theory today, mostly just an update on where the figures currently stand. As you can see, I've gone with the local highway patrol car as inspiration for the base with a star indicating the figures forward facing. The stars are done pretty simply, with a dot of bronze coloured metallic paint...then I cheat. I draw the star over the top with a fine marker pen. When preparing a dozen bases in a similar manner, sometimes a shortcut like this makes the process a bit less tedious. The downside is that you need to spend a bit longer before clear-coating or spray varnishing the marker ink, otherwise it's prone to running.

A Fox's Guide to Figure Painting (Part 13)

Image
I've come up with some inspiration for my bases, something to make them more distinctive. Here's a local highway patrol car from this part of the world... Since this squad is generally being used as police and peacekeepers, they aren't stealthy in any way. They like to make their presence felt, and if you cross their path, you're probably breaking the law and will feel their wrath. With that in mind, here's the base scheme... Building up a sequence of blue checkers on the white. Maybe with the bright orange as a name plate for the officer (we'll see about that one). Here's a few of the bases together... At the 'front' of the base, I'll put a gold star. This will designate the facing for those game systems that require the 'front' of the figure to be indicated. At the back, I'll add the officer's name.

A Fox's Guide to Figure Painting (Part 12)

Image
Good eyes and faces give a figurine character, they can cover a multitude of sins on the rest of the piece. Good bases ground the figure into their world. This post covers the preparation work, along with some of my theory about bases. First the prep... Along the top Row... 1. This is a typical 30mm round base, common to many games at the moment (Warmachine and Malifaux are the two I'm most familiar with). These bases are also an exact match for the Sci-fi Reaper Bones squad I'm painting up. 2. I don't particularly like hollow plastic bases, because I like to drill things into them, and the plastic can be a bit flimsy when figures see regular use. For this reason, I mould up my own bases in resin, or buy custom bases that fit the theme I'm working with. The depicted base here uses a dungeon floor design. 3. Once I've moulded up a base, it needs to be primed. As I said earlier, I tend to use a grey primer because it's pretty cheap and readily available, and it le

A Discussion on Australian Freeforming (Part 4)

Having studied linguistics, I fully understand that language is an evolving construct. What might have a certain meaning at one time or in one context might take on a new meaning in a new context, or might develop into a new form as time passes. My understanding of the term "Australian Freeform" is anchored in the east cost Australian convention scene of the mid 1990s, I didn't know of it as "Australian Freeforming" at the time, is was just "Freeform"... It was only in contact with the American form of "freeform" gaming that I even realises that this was a roleplaying artform specific to the game conventions of Australia's east coast. Sure, there are a number of similar game types around the world now (larger "jeep-forms" may fit this mould, as may the form known in some circles as "theatre-form"), there is probably quite a bit of overlap in these game forms, but I'm not familiar enough with the other to make a con

A Discussion on Australian Freeforming (Part 3)

There are some great freeform writers in Australia, but generally a writer will consider their work to be a piece of art, something that they like to keep under their control. This is an overgeneralisation, but it might help explain why there is so little information about Australian Freeforms on the internet. The work is often kept close to the writer's chest, and in a little bit of ego sensitivity a lot of writers feel that their work might not be done justice when they aren't present to shepherd the results. It also doesn't help that a lot of freeforms are written with ad hoc notes and marginalia through the text offering suggestions on how the event might be run best. An often cited resource for Australian Freeforms is a set of minutes from a seminar held in 1995 at the Necronomicon Convention. The first set of links I had to those minutes is dead, but this seems to be a new set of those notes (possibly posted by the Jacinta who is currently the 'writer wrangle

A Discussion on Australian Freeforming (Part 2)

It took a while to find the old lexicon of 'East Coast Australian Gaming Terms', because a few of the old links were dead. Finally, I managed to find a copy of it that still exists ( http://gamingknack.blogspot.com/2011/06/australian-convention-roleplaying.html ).The 'formal' definition of a freeform according to this lexicon is... Freeform Theatrical roleplaying events in which a large number (up to two hundred and fifty!) roleplayers simultaneously interact in a single area with minimal plot or gm intervention. In a freeform, one assumes a character and goes for broke! Freeforms are characterised by a low GM to player ratio and by a large degree of player independence - participants being free to characterise, plot, scheme or generally wheel and deal according to simple character sheets or game mechanics. Freeforms may or may not be driven by external plot events. Freeforms are an Australian invention. The world's first freeform was run by Peter Quinton at Octocon

A Discussion on Australian Freeforming (Part 1)

There are many styles of roleplaying, from the traditionally understood tabletop variety, boffer LARPs, and Computer RPGs which seem to get all the attention among non-gamers, but there are plenty of other styles of play that draw a bit of interest because they aren't so easy to pigeonhole. Ov the past few years, I've been asked many times on the story-games.com forum to describe the style of gaming known as the 'Australian Freeform', I've written articles and papers on the topic, and have responded numerous times for information about it. I don't claim to be an expert, but I have become a defacto source of information. (For an example article see issue 3 of Playground Magazine at  http://www.magcloud.com/browse/magazine/452504  ) After a recent conversation on G+, I've decided to gather my conversation responses into a series of blog entries. This way when someone asks again, I can just point them to this series of posts and have the answers ready to go. I&

A Fox's Guide to Figure Painting (Part 11)

Image
One of the great things about miniature painting is the fact that it's a modular hobby. That's one of the things that has kept Games Workshop in business for decades, and numerous other companies over the years. The Reaper Bones "Vampire Level" Kickstarter set had a great assortment of all different figures, including high-tech sci-fi figures, fantasy stuff, creatures, and plenty of figures that I wouldn't normally have a use for. A notable one of these looks like a "Warforged", I can't think of any games I play that use characters like this, and it vaguely looks like it could work in a sci-fi setting. Perhaps after watching "The Wolverine" recently, I've been inclined to paint a robot with a flaming sword.  I figured that the team I've painted up could do with a heavy infantry, so this "warforged" could work as a heavy cyborg for the team.  Generally painting up the figure according to the same colour scheme (white/blue b

A Fox's Guide to Figure Painting (Part 10)

Image
It is time to get to the individual detailing on figures. By this stage, I've added in the eyes where they are exposed, I've done a few degrees of drybrushing on the bases, and I've started shading hair. I realised at this point of the process that a few of the weapons are common across multiple figures, but I didn't necessarily paint them up the same way with the earth brown undercoat colour. To bring these weapons back into line, I've made sure that their shading effects are similar. I'd like to think that the weapons now look like different degrees of maintenance have been undertaken by their respective holders.  But the real detailing is elsewhere. The figure to note in this update is the heavy weapons specialist with the flamethrower on the bottom left of the image. He wears distinct padding on the shoulder hip and shin of his right side. This is obviously heat resistant padding to avoid damage from his own flamethrower. I decided to go with a flame theme h

A Fox's Guide to Figure Painting (Part 9)

Image
I apologise for the quality of these illustrations, I'm playing with a new sketching program on my iPad and it feels like finger painting. This sequence of sketches is basically designed to show the way I paint eyes on figures, it's a technique I learned from a few painters many years ago, gradually refining it into my own style. Let's start with the basic figure face. The problem with fine detail on figures is that you often need to create minute elements that are smaller than a single drop of paint on the end of a brush tip. There are ways around this. The first thing I do is to apply a white dot over the entire area of the eye. It doesn't matter if this dot is bigger than the final eye (in fact it's probably good if this dot is too big). If i'm doing something more exotic (like a cat's eye), I might colour this sclera in yellow, red, or some other shade. Next we determine the colour of the iris. This can be done with a simple stri

A Fox's Guide to Figure Painting (Part 8)

Image
One of my favourite techniques for getting a metallic effect on metal figures is to just go with the medium. I just take a sharp hobby knife and scrape back the paint and primer until a bare metal surface shows...nothing looks more metallic than raw metal. But these figures aren't metal, so that technique can't be used at all. I need a different way to bring highlights and contrast to the parts that I want to look metallic. Since the metallic components on these figures aren't very big, there isn't much room for drybrushing them. This is especially true for the metallic bands on the armour and the outlined panels. Instead I load a small amount of paint onto the tip of the brush, and draw in the topmost edges and outermost parts that look like they'd be likely to catch the light. The paint I use for this is three parts a bright gold metallic, with one part silver (sometimes I might add in a touch of white to make the mix a bit more opaque because the metallic paints

A Fox's Guide to Figure Painting (Part 7)

Image
Now that I've reached a point that I'm satisfied with for the armour, it's time to play with the secondary colour that dominates the weapons and provides accents to the existing armour pieces. Using the same ideas behind the armour, I have begun with a dark shade (brown earth), and now I mix in shades of a copper metallic paint. Heavy drybrushing ensures all of the weapons are coated in this shade except for the deepest crevices and shadows. A second, lighter drybrush is done with the straight metallic copper colour, and while I'm playing with the straight copper I add some bands across  the figures' boots, wrists, elbows, and outline certain panels on the armour.  This pulls the weapons and armour into a closer synergy. The various parts of the figure feel like a whole, rather than disparate elements. I'm finally getting some ideas about how the base should look, and I start this by reflecting the metallic shades of the weaponry. A brown earth base tone is appl

A Fox's Guide to Figure Painting (Part 6)

Image
All eleven figures have now had their armour finished. Well, finished is probably not the best word, but this stage of the process is over. I'll come back to add some details and flourishes later, but the basic colouring is done. As a group, they seem pretty coherent at this stage, so I'm on the right track. Later I might be adding some features to make them more individual, but not too much. We need to keep in mind that this group is a single team.

A Fox's Guide to Figure Painting (Part 5)

Image
When I paint figures, I like to build up depth through a couple of layers.  In some cases, that might be starting with a colour approximately what I'm after, then shading the crevices darker with thinned paint or ink that sinks into all of the cracks and details, then applying a highlight layer through a technique like drybrushing. In some cases it might be starting with the darkest shadow tone, then gradually building up layers of lighter colour with progressive stages of drybrushing. The latter technique is what I've done here. The first layer of drybrushing (applied to all of the figures) was a mix of two parts base colour to one part white. The five figures on the right have each had two more layers of drybrushing applied to them, the first of these extra layers was one part base colour to two parts white, and the final drybrushing was pure white. Remember that these figures are designed to look like white armour with shadows. It's not quite a "stormtrooper armour&

A Fox's Guide to Figure Painting (Part 4)

Image
Before we go much further, a simple rhetorical question... Why did I only use two base colours for the figures (one for the armour and one for the metals)? It just something I do to make sure a figure doesn't get to busy with different colours. I'll add in other colours when detailing comes up later in the process, but for the core colouring I'll stick to a single colour and some kind of accent colour. If I use a third colour, I'll use the old 60-30-10 ratio that is common to industrial and interior design (that's probably an old habit from years of university training and study)...60% of the figure painted with a dominant shade, 30% of the figure painted with a secondary feature colour, and 10% painted in either of these shades (giving a 60-40 or 70-30 ratio) or using that final 10% to create an accent colour (perhaps depicting a figure's rank or something special about them). More colours than that and you can easily get overwhelmed with the palette of choices

A Fox's Guide to Figure Painting (Part 3)

Image
I had an art teacher who once stated that the painting doesn't really begin until you've laid down the first batch of colours and fully covered the canvas with pigments that will underlay the final work. This bit of the procedure is basically the final bit of prep work before the "proper" painting can begin. In the case of these miniatures, I painted everything I intended to be metallic with a dark earthy brown colour. The thought process going through my head here was to indicate that even though the armour is clean and pristine, the weapons see a lot of use, they are regularly oiled and maintained. I also like my metallic shades to be something more than a straight silver or gold...perhaps indicating alien forging technologies, or alloys that just aren't seen here on Earth...so I give them base coats of reds, greens, blues and other shades to make them a bit interesting. I touch up the areas that aren't metallic with the sky blue colour, just to make sure ev

A Fox's Guide to Figure Painting (Part 2)

Image
One of the keys to painting good figures is laying a good base coat of colour. This gives a foundation to build up detail and really make the figures something special.  Normally with a metal figure I'd use a good primer.  Traditionally many painters use a black primer for dark figures and a white primer for light or vibrantly coloured figures. I've even seen a fascinating technique where figures are sprayed with black primer from below, and white primer from above to give a built in shadow effect.  Reaper Bones are supposedly made from a similar plastic to acrylic paint. This means they shouldn't need a primer. But most plastics are hydrophobic, this means that water doesn't adhere well to them, instead it beads  and tries to separate from the surface. Bones are no different, if you water the base coat down, paint doesn't stick to the figures very well. If you use a paint that's too thick, it risks obscuring detail on the figure, so it's tempting to use a f

A Fox's Guide to Figure Painting (Part 1)

Image
My laptop is dead. After a thorough cleaning, half of the keys still don't work on it and now it goes through an endless cycle of rebooting, staying active for a minute or two and then rebooting again. I'll hopefully be able to rescue the hard drive with notes for dozens of unfinished games, hundreds of illustrations, and all the other stuff one might normally have on a general use computer. So, while I work on getting a new replacement, the blog will take a detour. I'll be focusing on something that can be handled purely with the iPad that has temporarily become my primary computer. Hopefully I'll get back to the geomorph tutorials soon. For the moment though... A Fox's Guide to Figure Painting I don't claim to be a great painter, I've scored a plenty of seconds and thirds for my painting in local wargaming events, even earning a couple of first places for best unit, or most interesting display. I've been paid to paint miniatures for friends, but never